Kringen En MediaWiki Slecht Plan: Difference between revisions
No edit summary |
|||
| (4 intermediate revisions by 2 users not shown) | |||
| Line 1: | Line 1: | ||
This page will go through a basic setup of MediaWiki. It is based on [[mediawikiwiki:Manual:Installing_MediaWiki|the official MediaWiki installation wikipage]], and it gives a few specifics for setting it up on a hosted account over at ULYSSIS. | |||
== Prerequisites== | |||
This tutorial assumes that you have [https://cyberduck.io/ Cyberduck] installed. A guide on how to install and use Cyberduck can be found on [[Accessing your files]]. You will also have to download the [https://www.mediawiki.org/wiki/Download MediaWiki installation files]. We recommend using either the latest version or the long-term support (LTS) version. | |||
== Installation == | |||
[[File:OpenCyberduck.png|left|thumb|400x400px|Open Cyberduck]] | As mentioned in the Prerequisites, we will be using Cyberduck for the installation of MediaWiki. Make sure you are logged in to your ULYSSIS account and that you see the following screen after opening Cyberduck [[File:OpenCyberduck.png|left|thumb|400x400px|Open Cyberduck]] | ||
In this tutorial, we will install our MediaWiki in the www folder. We can do this by double clicking the folder. | |||
[[File:GoToWWW.png|left|thumb|394x394px|Go to the WWW folder]] | [[File:GoToWWW.png|left|thumb|394x394px|Go to the WWW folder]] | ||
We are now ready to upload the necessary files for the MediaWiki installation. This can be done by clicking the 'Upload' button at the top of the Cyberduck window. A pop-up should appear on your screen. | |||
[[File:ClickOnUpload.png|left|thumb|Click on the upload button]] | [[File:ClickOnUpload.png|left|thumb|Click on the upload button]] | ||
Choose the | Navigate to the folder in which the installation files are stored. Select them and click on 'Choose' on the bottom right of the pop-up. | ||
[[File:SelectMediaWikiZIP.png|left|thumb|Select the MediaWiki zip]] | [[File:SelectMediaWikiZIP.png|left|thumb|Select the MediaWiki zip]] | ||
The upload process wil now start automatically. Incase you get another pop-up, be sure to click "Allow", otherwise the files will not be uploaded. | |||
[[File:WindowPopup.png|left|thumb|Click allow]] | [[File:WindowPopup.png|left|thumb|Click allow]] | ||
After the upload is completed, you should get a window which looks like this: | |||
[[File:WaitUntilComplete.png|left|thumb|Wait until the upload is complete]] | [[File:WaitUntilComplete.png|left|thumb|Wait until the upload is complete]] | ||
In the main Cyberduck window, you should be able to see the MediaWiki file you just uploaded. To unzip this file, just right click it and choose 'expand archive'. | |||
[[File:RightClick ExpandArchive.png|left|thumb|405x405px|Right click on the zip and choose expand archive]] | [[File:RightClick ExpandArchive.png|left|thumb|405x405px|Right click on the zip and choose expand archive]] | ||
This process might take a while, you can verify the progress by looking at the bottom part of the Cyberduck window. | |||
[[File:ProgressBottomWindow.png|left|thumb|411x411px|The progress can be found on the bottom of the window]] | [[File:ProgressBottomWindow.png|left|thumb|411x411px|The progress can be found on the bottom of the window]] | ||
Select everything in the MediaWiki folder and move it | Select everything in the new MediaWiki folder and move it out of the folder. | ||
[[File:SelectEverything.png|left|thumb|379x379px|Select everything in the MediaWiki folder]] | [[File:SelectEverything.png|left|thumb|379x379px|Select everything in the MediaWiki folder]] | ||
Delete the zip file and the original folder by right clicking and choosing delete | Delete the zip file and the original folder by right clicking and choosing delete | ||
[[File:DeleteOGfiles.png|left|thumb|Delete the zip file and the original folder]] | [[File:DeleteOGfiles.png|left|thumb|Delete the zip file and the original folder]] | ||
Now we'll go to UCC and | Now we'll go to UCC and create a database for our mediawiki installation. (if this is your first time making a database, we reccomend our documentation on [[Using MySQL]]) | ||
[[File:GoToUCC.png|left|thumb|Go to UCC]] | [[File:GoToUCC.png|left|thumb|Go to UCC|560x560px]] | ||
Choose the 'Add database' option just below your username. This should bring you to a page which looks like this. We reccomend naming your database 'wiki'. | |||
[[File:CreateDB.png|left|thumb|Create a new MySQL database]] | [[File:CreateDB.png|left|thumb|Create a new MySQL database|568x568px]] | ||
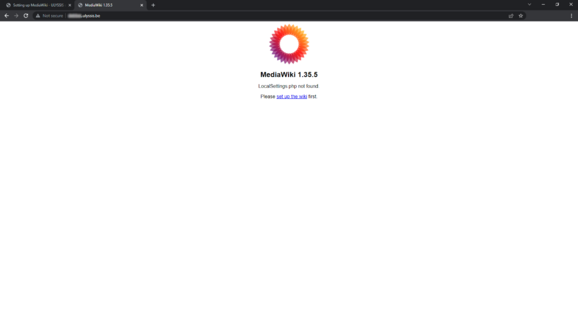
You are now ready to configure your new wiki at username.ulyssis.be . To start, click on the 'set up the wiki' hyperlink. | |||
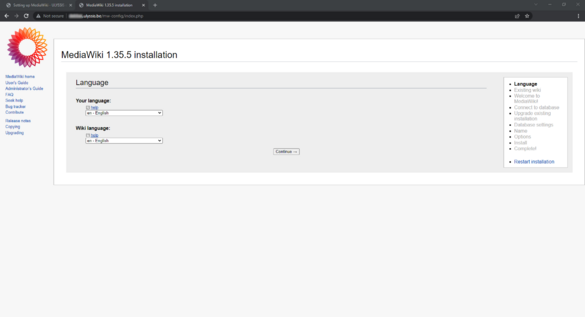
[[File:GoToWiki.png|left|thumb| | [[File:GoToWiki.png|left|thumb|578x578px|Go to your wiki at username.ulyssis.be]]You will be prompted to set your prefered language. | ||
[[File:SetLanguage.png|left|thumb| | [[File:SetLanguage.png|left|thumb|585x585px|Set your language ]] | ||
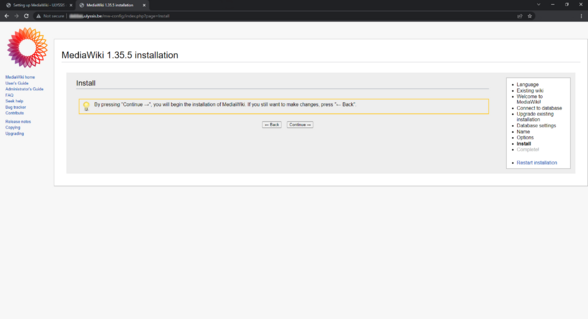
This is the installation | This is where the real installation begins. We can just click 'continue'. | ||
[[File:InstallPage.png|left|thumb| | [[File:InstallPage.png|left|thumb|588x588px|This is the beginning of the installation ]] | ||
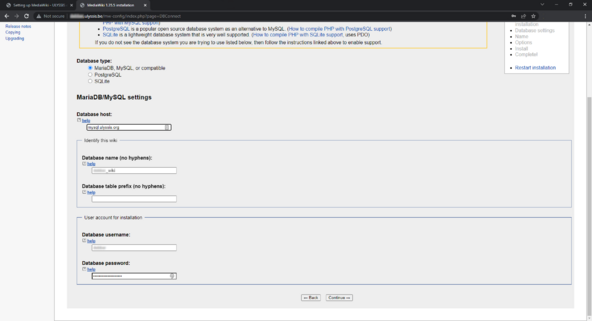
We will first configure the database we just created. This is specific to your personal configuration, an example has been given below. | |||
[[File:ConfigureDB.png|left|thumb| | [[File:ConfigureDB.png|left|thumb|592x592px|Configure the database in MediaWiki]] | ||
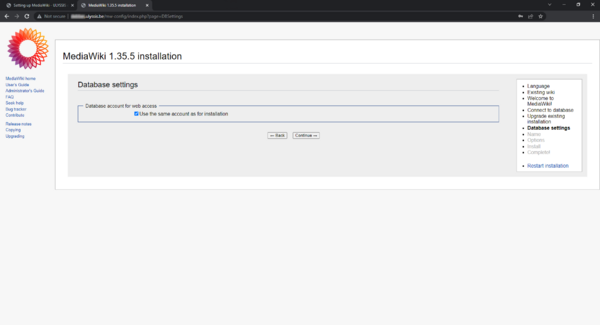
Once the database has been configured, you can just click 'continue'. On the following page, make sure the checkbox is checked and click 'continue' again. | |||
[[File:DBSettings.png|left|thumb| | [[File:DBSettings.png|left|thumb|600x600px|Database settings in MediaWiki]] | ||
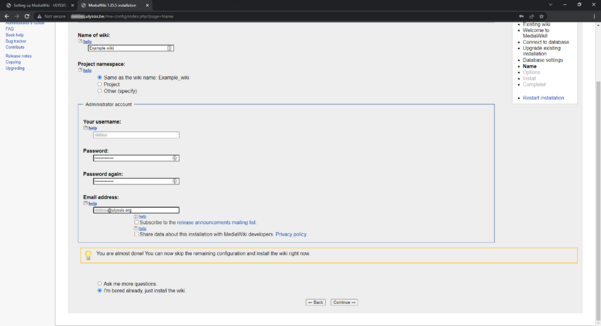
We now get promted to choose a wiki name (you can choose this to be whatever you want), we also have to make the administrator account. | |||
[[File:WikiSettings.png|left|thumb| | [[File:WikiSettings.png|left|thumb|601x601px|Configure the final MediaWiki settings]] | ||
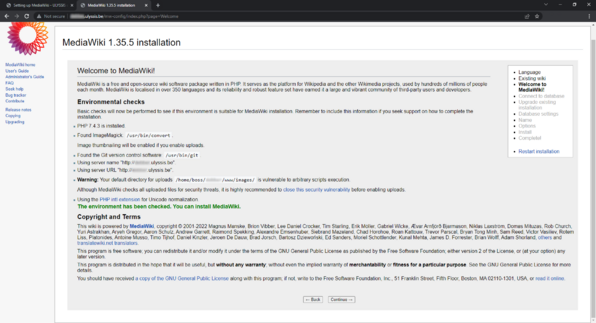
Once everything has been created, you should land on the following page. You don't have to configure anything on this page. | |||
[[File:InstalationPage.png|left|thumb| | [[File:InstalationPage.png|left|thumb|596x596px|This is the final install page]] | ||
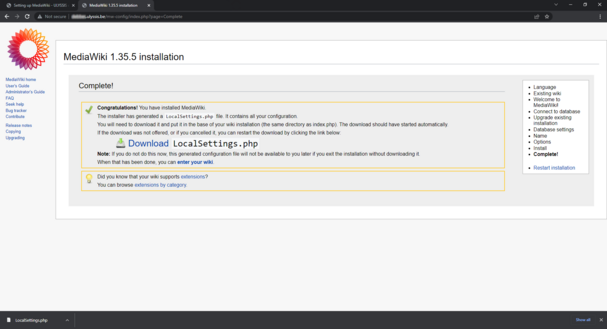
When the MediaWiki installation has been confirmed, you will have to download the 'LocalSettings.php' file. This file contains the essential settings for your MediaWiki instance to work properly. | |||
[[File:DownloadLocalSettings.png|left|thumb| | [[File:DownloadLocalSettings.png|left|thumb|607x607px|Download LocalSettings.php]] | ||
Upload LocalSettings.php | Upload LocalSettings.php via cyberduck to the same folder where you placed the MediaWiki files. | ||
[[File:UploadLocalSettings.png|left|thumb|Upload LocalSettings.php]] | [[File:UploadLocalSettings.png|left|thumb|Upload LocalSettings.php]] | ||
You can now open a new tab, and go to username.ulyssis.be . You should be able to see your new wiki. | |||
[[File:OpenNewTab.png|left|thumb|486x486px|Open a new tab and go to username.ulyssis.be]] | [[File:OpenNewTab.png|left|thumb|486x486px|Open a new tab and go to username.ulyssis.be]] | ||
For further support, we recccomend the [https://www.mediawiki.org/wiki/Manual:Installation_guide official MediaWiki documentation.] | |||
Latest revision as of 08:39, 6 May 2022
This page will go through a basic setup of MediaWiki. It is based on the official MediaWiki installation wikipage, and it gives a few specifics for setting it up on a hosted account over at ULYSSIS.
Prerequisites
This tutorial assumes that you have Cyberduck installed. A guide on how to install and use Cyberduck can be found on Accessing your files. You will also have to download the MediaWiki installation files. We recommend using either the latest version or the long-term support (LTS) version.
Installation
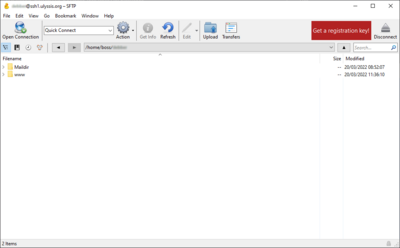
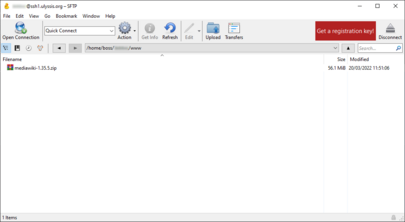
As mentioned in the Prerequisites, we will be using Cyberduck for the installation of MediaWiki. Make sure you are logged in to your ULYSSIS account and that you see the following screen after opening Cyberduck
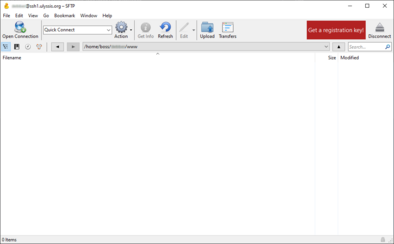
In this tutorial, we will install our MediaWiki in the www folder. We can do this by double clicking the folder.
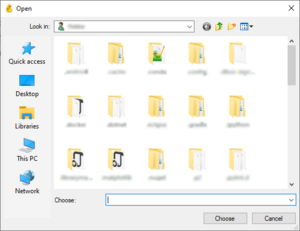
We are now ready to upload the necessary files for the MediaWiki installation. This can be done by clicking the 'Upload' button at the top of the Cyberduck window. A pop-up should appear on your screen.
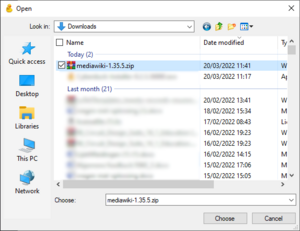
Navigate to the folder in which the installation files are stored. Select them and click on 'Choose' on the bottom right of the pop-up.
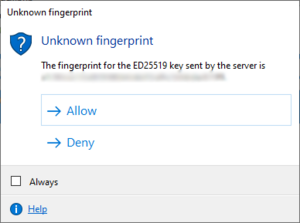
The upload process wil now start automatically. Incase you get another pop-up, be sure to click "Allow", otherwise the files will not be uploaded.
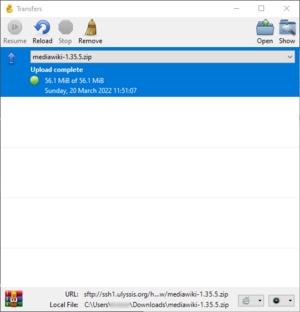
After the upload is completed, you should get a window which looks like this:
In the main Cyberduck window, you should be able to see the MediaWiki file you just uploaded. To unzip this file, just right click it and choose 'expand archive'.
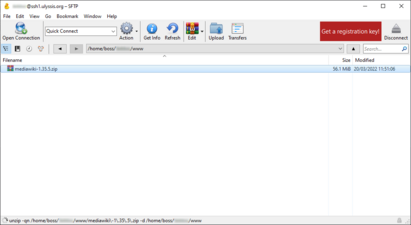
This process might take a while, you can verify the progress by looking at the bottom part of the Cyberduck window.
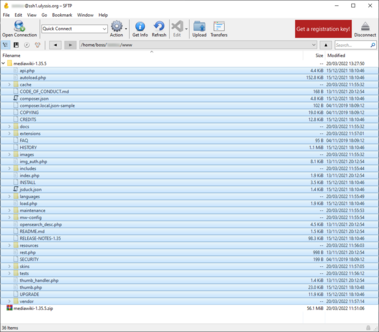
Select everything in the new MediaWiki folder and move it out of the folder.
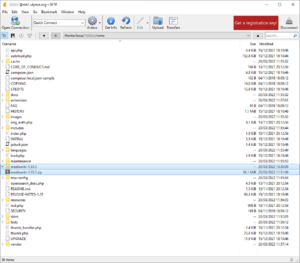
Delete the zip file and the original folder by right clicking and choosing delete
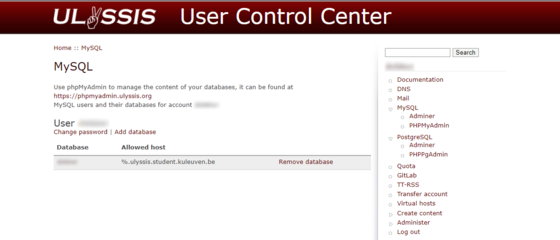
Now we'll go to UCC and create a database for our mediawiki installation. (if this is your first time making a database, we reccomend our documentation on Using MySQL)
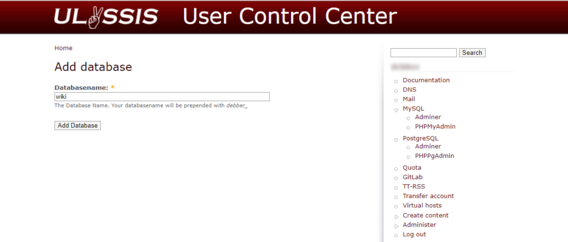
Choose the 'Add database' option just below your username. This should bring you to a page which looks like this. We reccomend naming your database 'wiki'.
You are now ready to configure your new wiki at username.ulyssis.be . To start, click on the 'set up the wiki' hyperlink.
You will be prompted to set your prefered language.
This is where the real installation begins. We can just click 'continue'.
We will first configure the database we just created. This is specific to your personal configuration, an example has been given below.
Once the database has been configured, you can just click 'continue'. On the following page, make sure the checkbox is checked and click 'continue' again.
We now get promted to choose a wiki name (you can choose this to be whatever you want), we also have to make the administrator account.
Once everything has been created, you should land on the following page. You don't have to configure anything on this page.
When the MediaWiki installation has been confirmed, you will have to download the 'LocalSettings.php' file. This file contains the essential settings for your MediaWiki instance to work properly.
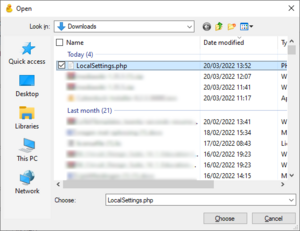
Upload LocalSettings.php via cyberduck to the same folder where you placed the MediaWiki files.
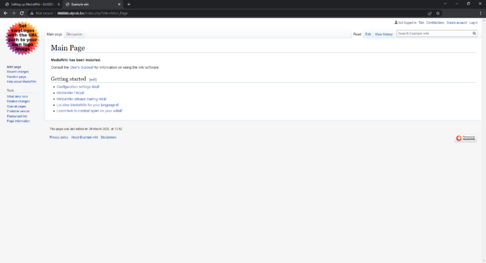
You can now open a new tab, and go to username.ulyssis.be . You should be able to see your new wiki.
For further support, we recccomend the official MediaWiki documentation.
