Mailbox in Thunderbird: Difference between revisions
No edit summary |
No edit summary |
||
| Line 45: | Line 45: | ||
[[File:After Clicking Retest GOOD.png|thumb|left]] | [[File:After Clicking Retest GOOD.png|thumb|left]] | ||
If this test succeeds, the pop-up can be closed by pressing the "Done" button on the bottom right. When the pop-up closes, a mailbox should be added to the left side of the main Thunderbird window. | If this test succeeds, the pop-up can be closed by pressing the "Done" button on the bottom right. When the pop-up closes, a mailbox should be added to the left side of the main Thunderbird window. After this first setup, the mailbox should synchronize automatically. | ||
[[File:After Clicking | [[File:After Clicking GetMessages.png|thumb|left|]] | ||
[[Category:Mail]] | [[Category:Mail]] | ||
Revision as of 15:39, 1 December 2021
When you create a ULYSSIS account, you get an email address: username@ulyssis.org. It is possible to check this mailbox via https://webmail.ulyssis.org. However, it is far more convenient and efficient to use a standalone email client. This article will explain the process of adding a mailbox to the Thunderbird client. Do note: this article is written for users who opted for a ULYSSIS mailbox. not for users who opted for a forwarded email address.
Thunderbird
Thunderbird is a free and open-source email client made by Mozilla. It is available for download at https://thunderbird.net. The installation process is fairly easy and thus will not be covered in this article.
Adding a ULYSSIS mailbox to Thunderbird
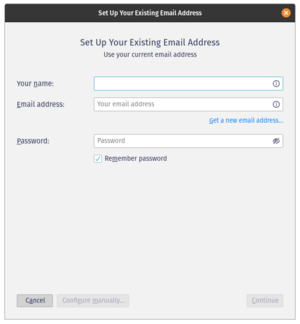
If this is the first mailbox being added to Thunderbird, the following pop-up should come up:
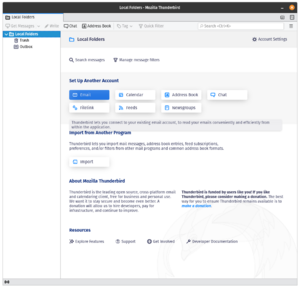
If the pop-up did not come up, or this is not your first mailbox; it is possible to click the Email button (highlighted in blue) under the "Set Up Another Account" section:
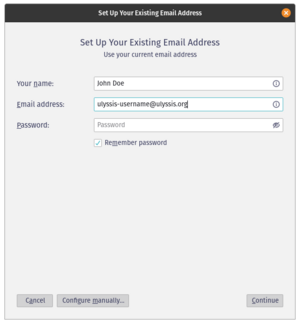
Once the pop-up is present, it becomes possible to dial in the settings for a mailbox. The first step is to fill in the Email adress field:
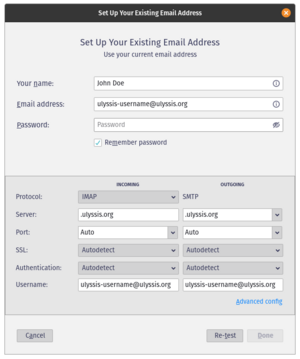
Notice, the button "Configure manually..." on the bottom left has become clickable. When this button is clicked, the pop-up should look like this:
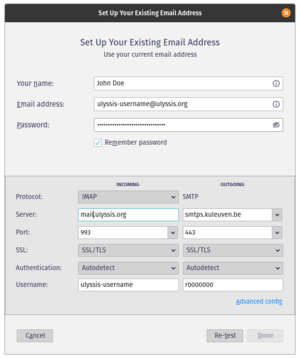
Now, fill in the information as follows:
| INCOMING | OUTGOING | |
|---|---|---|
| Protocol: | IMAP | SMTP |
| Server: | mail.ulyssis.org | smtps.kuleuven.be |
| Port: | 993 | 443 |
| SSL: | SSL/TLS | SSL/TLS |
| Authentication: | Autodetect | Autodetect |
| Username: | ULYSSIS-username | r-number |
![]() notice
notice
The ports used to configure a ULYSSIS mailbox, are not automatically recognized by Thunderbird. This means they should be entered manually instead of using the drop-down.
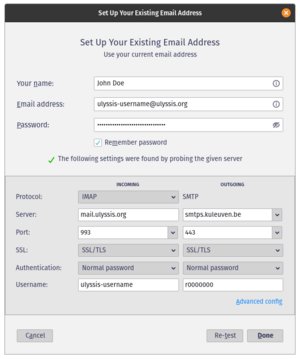
The "Re-test" button on the bottom right is used to validate the settings. When pressed, the pop-up should look like this:
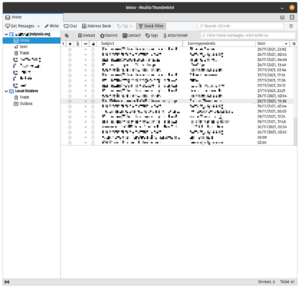
If this test succeeds, the pop-up can be closed by pressing the "Done" button on the bottom right. When the pop-up closes, a mailbox should be added to the left side of the main Thunderbird window. After this first setup, the mailbox should synchronize automatically.
